Segpay NATS Integration
Integrating Segpay with NATS (The Next-Generation Affiliate Tracking Software) empowers you to process payments and manage your affiliate program effortlessly. This comprehensive guide will walk you through configuring this powerful integration.
Who Should Use this Guide?
This document is tailored for website administrators and developers familiar with NATS and who are responsible for integrating payment processing solutions.
What You Need:
Before you begin, make sure you do the following:
-
Check Your NATS Version: Ensure your NATS version is compatible to integrate with Segpay as outlined in this document. Contact NATS Support if unsure.
-
Contact your Segpay Account Manager to request the following:
-
Pricing: Provide your Segpay Account Manger the pricing you want to offer your customers.
-
User Name & Access Key: Email Segpay Tech Support at techsupport@segpay.com and ask to create a User Name and Access Key for Segpay Reporting Services (SRS).
-
Getting Started:
-
Log into the Segpay Merchant Portal at https://mp.segpay.com/ to begin setting up your Price Points, Postbacks, and Packages.
-
Refer to the NATS4 Segpay Integration Guide: For additional details on integrating your site with Segpay and NATS, refer to the NATS4 Segpay Integration Guide: https://tmmwiki.com/index.php/NATS4_SegPay.
Step 1: Add Segpay as a Biller in NATS
Follow these steps to add Segpay as a Biller in NATS:
-
Navigate to the Billers Admin section in NATS.
-
Select Segpay from the Biller dropdown menu and click Add.
If you don't see Segpay as a biller in NATS, submit a Support Ticket. In this case, you may need an updated version of NATS.
-
If prompted, enter your credentials in the "Account Info" section:
-
Segpay Merchant ID (MID)
-
SRS Username
-
SRS Access Key
If you aren't prompted for this information, reach out to NATs for an updated version.
-
Step 2: Set Up Segpay Price Points
Price Points are the different products or services you offer, and they are referred to as "
-
Recurring
-
One-Time
-
Digital Purchase
-
Instant Conversion
Each pricing model can be configured with a static price. To add a new Price Point:
- Log into the Merchant Portal: https://mp.segpay.com/
- Go to My Websites > Price Points

- Click Add Price Points to create a new Price Point.

- Configure the Price Point:
- Description: Provide a clear description (e.g., "30-Day Membership").

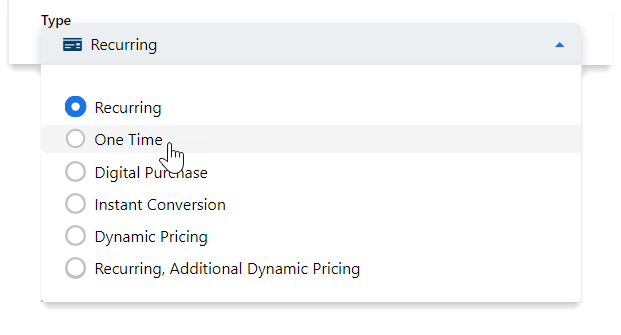
- Price Point Type: Choose from Recurring, One-Time, Digital Purchase, or Instant Conversion.
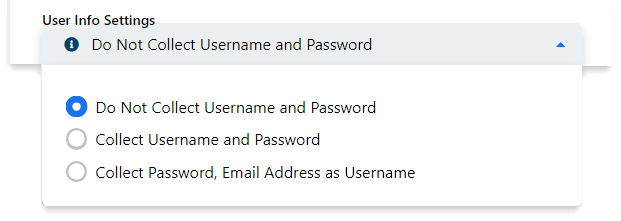
- User Info Settings: Select the information you want to collect.
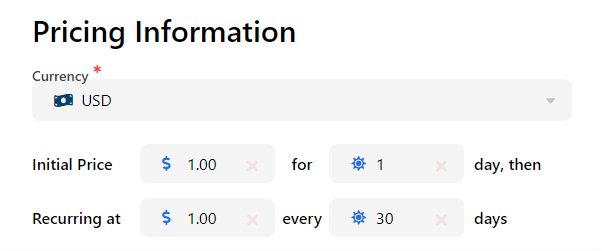
- Pricing Information: Enter the price, currency, billing frequency, etc.
- Description: Provide a clear description (e.g., "30-Day Membership").
- Click Save.
If you're looking for something more flexible for your customers, we offer Dynamic Pricing (one-time payments) or Dynamic Recurring Billing (subscriptions).
Consult your Segpay Account Manager for details and information on compliance approval.
Step 3: Set Up Segpay Postbacks
Postbacks are notifications sent from Segpay to your NATS system to update transaction and membership statuses.
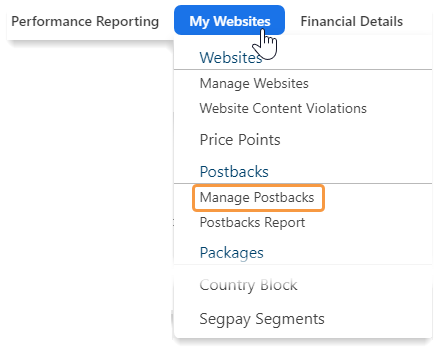
- Go to My Websites > Manage Postbacks in the Merchant Portal.
- Click
Add New Postback :
- Enter a
Description :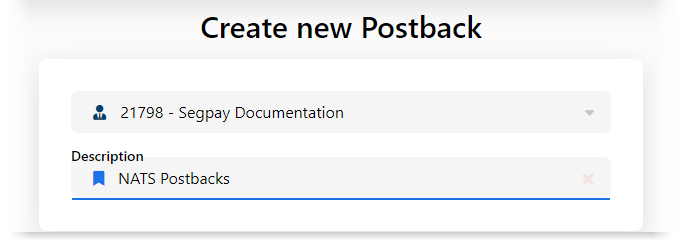
-
Add Postback URLs: Replace join.linkdomain.com with your actual NATS domain. If you're managing your members, NATs only requires a Disable and a Transaction Postback.Disable Postback
join.linkdomain.com/signup/process_segpay.php?action=<action>&username=<extra username>&purchaseid=<purchaseid>Transaction Postback
join.linkdomain.com/signup/process_segpay.php?action=<action>&stage=<stage>&approved=<approved>&name=<billname>&email=<billemail>&country=<billcntry>&transtype=<trantype>&purchaseid=<purchaseid>&transid=<tranid>&price=<price>&username=<extra username>¤cycode=<currencycode>&eticketid=<eticketid>&memberid=<extra foreignid>&session=<extra natssess>&merchantpartnerid=<extra merchantpartnerid>&xsellnum=<xsellnum>&upsell=<extra upsell>&tokenplus=<extra tokenplus>&octoken=<extra octoken>&cardtype=<cardtype>&paymenttype=<paymenttype>&xref1=<extra xref1>&xref2=<extra xref2>&relatedtranid=<relatedtranid>&transGUID=<transguid>Reactivation Postback (optional)
join.linkdomain.com/signup/process_segpay.php?action=<action>&stage=<stage>&approved=<approved>&name=<billname>&email=<billemail>&country=<billcntry>&state=<billstate>&city=<billcity>&address=<billaddr>&transtype=<trantype>&purchaseid=<purchaseid>&transid=<tranid>&price=<price>&username=<extra username>¤cycode=<currencycode>&eticketid=<eticketid>&memberid=<extra foreignid>&session=<extra natssess>&merchantpartnerid=<extra merchantpartnerid>&xsellnum=<xsellnum>&transGUID=<transguid>
Important Postback Notes:
-
Replace
join.linkdomain.comwith your actual NATS domain. -
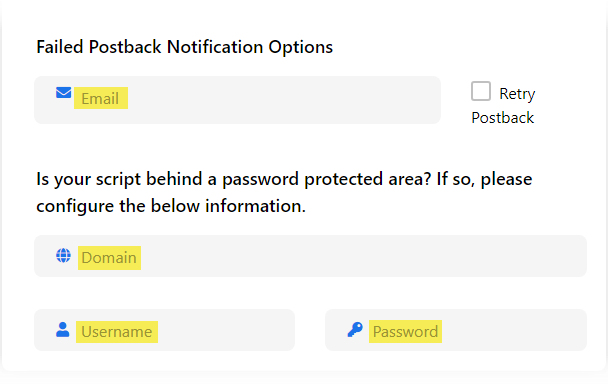
Set an email for failed postback notifications. Provide a username/password if your script is behind protection.
Step 4: Set Up Segpay Packages
Packages, referred to as "CC eTicket ID" in NATS, group your Price Points and Postbacks together. After you add Price Points to your Packages, you'll need to associate these values with your NATS Join Options.
-
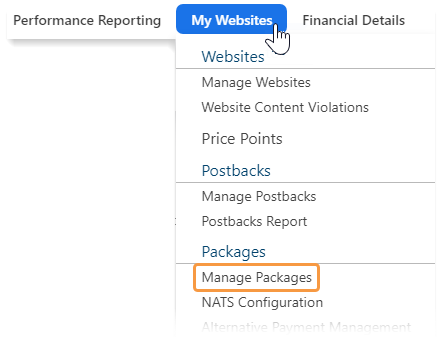
Go to My Websites > Manage Packages in the Merchant Portal.
-
Click Add Package

-
Configure Package:
-
Description: Enter a clear, descriptive name for the package (e.g., "Premium Membership Package").

-
Merchant URL: Select the relevant website URL from your list of approved URLs.

-
Processing Status: Select any status. All new statuses are automatically set to Test Mode for initial setup. Contact Segpay to switch to Live Mode when you're ready to process real transactions.

-
Postback: Select the postback you created in Step 3.

-
-
Click Save.
-
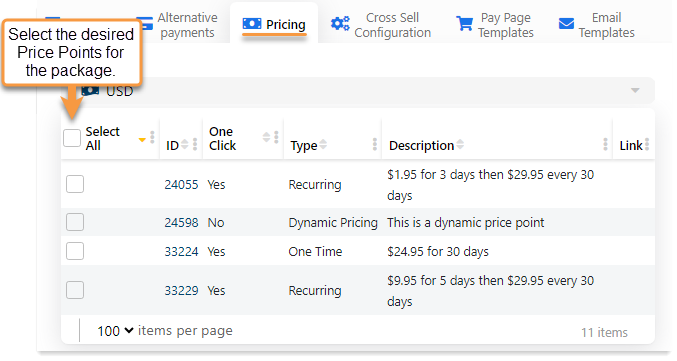
Click the Pricing tab and select the desired Price Points for the package.
-
Click Save again.
-
In your NATS Join Options, add the Package ID that you just created.

Newly created packages default to Test Mode. A Segpay employee will need to switch the package to Live Mode when you're ready to process real transactions.
Step 5: Manage Cross Sells
Cross Sells allow you to offer additional products or services to customers during the checkout process.
-
Go to My Websites > Manage Packages in the Merchant Portal.
-
Click Edit next to the package where you want to add cross sells.
-
Select the Cross Sell Configuration tab.

-
Choose from your list of approved Cross Sells.
-
Click Save.
If you need to add a new Cross Sell, email techsupport@segpay.com with the Package ID and Price Point ID. Segpay will work with you to get it approved.
NATS Instructions for Cross Sells
Cross-selling allows you to promote and sell additional products or services to customers during their initial purchase. Here's how to configure this in NATS for Segpay.
Incoming Cross Sell
This allows users to purchase access to your site through a partner's join form. You must configure a Cross Sell program first.
-
In NATS, go to Upsells Admin > Incoming Cross Sells.
-
Select Segpay as the biller.
-
Choose the Site/Program where the Cross Sell will apply.
-
Enter the required Biller Info (Package ID and Price Point ID).
Outgoing Cross Sell
This allows users to sign up for other sites from your join form. Configure your incoming cross sells first.
-
In NATS, go to Upsells Admin > Outgoing Cross Sells.
-
Select Segpay as the biller.
-
Choose the Site/Program.
-
Enter the required Biller Info (Package ID, Price Point ID, and Ref Code).
You can find the "Ref Code" in your NATS cross sales page.
Setting Up a Cross Sale for Your Merchant Account
-
Create the Price Point and Package in Segpay. Add the values to NATS and confirm the expected NATS Xref value with Segpay.
-
Email the information to techsupport@segpay.com for Compliance approval.
-
After approval, add the new cross sale to your Package(s) under the Cross-Sell Configuration tab.
-
Provide Segpay with a link to test your offer and confirm the Xrefs are passed correctly.
-
Once tested, Segpay will switch your packages to live.
Setting Up a Cross Sale with a Merchant Partner
-
Inform Segpay about which merchant is offering the main Sale and which is offering the Cross Sale.
-
Follow the same steps as above (1-5) for setting up a Cross Sale for your own Merchant Account.
Step 6: Upsell in NATS & Segpay
NATS
-
Outgoing Upsells: Lets you sell upgrades to your members. (Upsells Admin > Outgoing Upsells tab > Select Segpay > Add)
-
Incoming Upsells: Let other sites sell upgrades to your members. (Upsells Admin > Incoming Upsells tab > Select Segpay > Add)
Segpay Merchant-to-Merchant Upsell
-
Create a one-click enabled Price Point and add it to a package.
-
"Provide the eTicket & Merchant Partner Segpay MID to techsupport@segpay.com.
-
Add the Price Point (Order ID) and Package ID (eTicket ID) in NATS for your Upsell offer.
Step 7: Test Your Configuration
Before going live, thoroughly test your integration in Test Mode in the Segpay Merchant Portal. This allows you to simulate transactions without charging real money. See our documentation, Credit Card Testing, for more information.
Step 8: Go Live
After successful testing, email Segpay Technical Support at techsupport@segpay.com to switch your account to Live Mode. They will conduct final verification checks. For more information, see our documentation, Credit Card Testing.
Additional Features
This section describes additional features you may want to include in your Segpay NATS integration.
NATS Upgrade Plus & Segpay Instant Conversion
This feature allows you to offer limited-access trials and let users upgrade to full memberships early. The Instant Conversion offer is valid up to 12 hours before the trial ends.
-
In Segpay's Merchant Portal, create an Instant Conversion Price Point.
-
Enter Initial and Recurring amounts as you would for a Recurring Price Point.
-
Configure additional settings:
-
Discount Price: Incentivize early upgrades.
-
Adjust Trial Length At Time of Conversion: Determine how the trial length is adjusted upon conversion.
Ensure the postback parameter
&transguid=<transguid>is added to your Transaction Postback.
-
NATS Token Plus & Segpay One Click
Before enabling Token Plus in NATS, ensure you have a Token Site set up in the Sites Admin.
One-Click payments streamline the purchasing process for returning customers, allowing them to make additional purchases without needing to re-enter their card information each time.
Token Plus (NATS):
-
Navigate to Sites Admin in NATS.
-
Add a Site and choose "Token" from the "Site Type" options. Save your changes.
-
Locate the newly created Token Site and click the "Set Join Options" action icon.
-
Edit an existing Join Option or create a new one where you want to enable Token Plus.
-
Check the "Token Rebuy Allowed" setting and save the Join Option.
One Click (Segpay):
1. In the Segpay Merchant Portal, go to My Websites > Price Points.
2. Edit the Price Point ID (corresponding to the NATS Order ID) that you want to enable One Click for.
3. Check the "One Click" box.
4. Save your changes.