Postbacks
A postback is an HTTP request that Segpay sends to your system after a transaction event occurs—such as when a customer subscribes or makes a purchase. This automated notification allows your system to sync membership data, provision access, update records, and manage customer details.
Prerequisites
To effectively use Segpay postbacks, you need to meet these requirements:
1. Base URL:
Set up your Payment Page link (Base URL) before creating postbacks. The payment page is necessary for processing payments. Refer to the Base URL document for guidance.
2. Postback Script:
Setting up a server-side script is required to process Segpay postback data. Essential elements include Web Server/Hosting, Server-Side Script, and SSL Certificate. Obtain scripts through Pre-Built Solutions, Developer Hiring, or contact Segpay Tech Support for guidance.
Postback Types
Segpay supports two categories of postbacks:
Member Management Postbacks
Member Management Postback types notify you about changes to a member's subscription status. You'll receive notifications when a new username is created, or when a member signs up for or cancels a service.
| Postback Type | Trigger | Purpose |
|---|---|---|
| Inquiry | During payment when Segpay collects a username. | Checks if the username already exists. If it does, defaults to the customer's email address. |
| Enable | After an approved purchase. | Instructs your system to grant access to the purchased service(s). |
| Disable | When a subscription expires or is cancelled. | Instructs your system to remove access for the member. |
| Cancellation | When a customer cancels an account or requests a refund/cancellation. | Notifies your system that the member requested cancellation. |
| Reactivation | When a cancelled or expired account is reactivated | Notifies your system that the member reactivated their subscription. |
Transaction Postbacks
Transaction Postbacks (TransPost) are triggered by any transaction (payment, refund, void, chargeback). You can create up to four transaction postbacks to send data to multiple systems (e.g., payment processor, analytics, accounting software).
Setting Up Postbacks
You set up postbacks in the Segpay Merchant Portal to define the specific data you want to receive after transaction processing or a member subscription change.
You can customize the available postback types and choose which data to receive by including parameters in your URL string.
Adding a New Postback
-
Log into the Merchant Portal: https://mp.segpay.com/
-
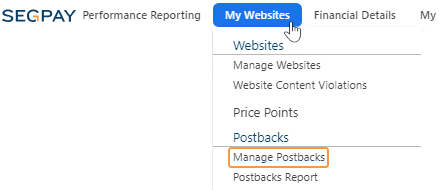
Navigate to My Websites > Manage Postbacks.
-
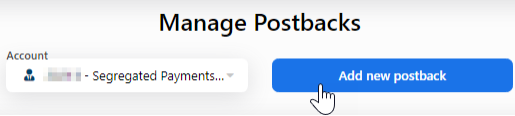
Click the Add New Postback button.
-
Configure postback settings by filling in the following fields:
Description : Enter a description for your postback.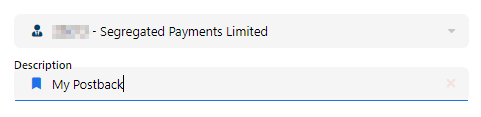
URL: The endpoint where Segpay will send the postback. Example:www.yourserver.com/YourScriptName.php 
Expected Response: The confirmation text Segpay expects for a successful postback. Example: ‘GOOD ’ or ‘OK ’.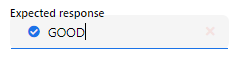
Error Response: Notification text indicating a failed postback. Example: ‘BAD ’ or 'ERROR '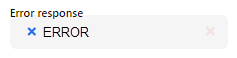
Failed Postback Notification Options: -
Email: Enter an email to receive notifications for failed postbacks. Required if ‘Retry Postback’ is enabled.
-
Retry Postback: Check this box if you want to retry failed postbacks. Member Management postbacks retry every 5 minutes for up to an hour, and Transaction postbacks retry hourly for up to 12 hours.

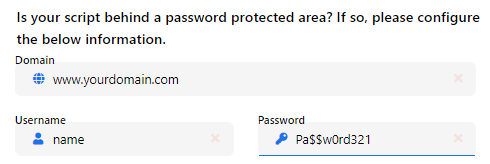
Password Protected Scripts: Only needed if your script is located in a password protected area.
-
Domain: Provide the URL for the script
-
Username/Password: Enter the credentials for accessing the URL
-
-
Click Save.
Postback Configuration Guidelines
Follow these guidelines to effectively configure and manage your postbacks, and streamline processing within your system.
-
URL field: You do not need to enter
https:// in the postback URL field; it's added automatically.
-
Response Fields: When entering text in the response fields, use a simple data string such as
TransactionConfirmed . The postback will not work if you use spaces, line breaks, html, etc.
-
Case sensitivity: Postbacks may include upper and lower-case characters. Do not require case-sensitive validation.
-
Response format: Return only simple text strings (e.g., `TransactionConfirmed`). Do not include HTML, spaces, line breaks, or special characters, as these will break the postback.
-
Script Configuration: When configuring your scripts, it's crucial to accommodate both synchronous and asynchronous postback types:
-
Synchronous Postbacks (Inquiry, Enable, Disable): These require your server to respond within a specific timeframe. A timeout will occur without a timely response, impacting the postback's effectiveness.
-
Asynchronous Postbacks (Transaction): These do not require a response from your server. They operate independently, utilizing standard HTTP response codes to convey the outcome of a request. Ensure your server is set up to process transaction postbacks correctly, even though no return response to Segpay is necessary.
-
Editing a Postback
-
Log into the Merchant Portal: https://mp.segpay.com/
-
Navigate to My Websites > Manage Postbacks.
-
Click the Edit link for the postback you want to edit.

-
Click Save to keep your new settings.
Member Management Postbacks - Details
Inquiry Postback
Trigger: Segpay collects a username and/or password during payment and needs to verify username availability.
Synchronous: Yes (waits for response, times out if no response received).
Availability: Only available when "Collect Username" is selected for the price point.
URL Structure:
Full Custom Example (all available parameters)
www.yourserver.com/scriptname.php?action=<action>&username=<extra username>&purchaseid=<purchaseid>&tranid=<tranid>&name=<billname>&firstname=<billnamefirst>&lastname=<billnamelast>&email=<billemail>&phone=<billphone>&address=<billaddr>&city=<billcity>&state=<billstate>&zipcode=<billzip>&country=<billcntry>&ip=<ipaddress>&eticketid=<eticketid>&price=<price>¤cycode=<currencycode>&initialvalue=<ival>&initialperiod=<iint>&recurringvalue=<rval>&recurringperiod=<rint>&desc=<desc>&customvariable=<extra customvariable>
Required Response: `GOOD` (or your custom "Expected Response" value)
Enable Postback
Trigger: After an approved purchase where username is collected.
Purpose: Instruct your system to grant access to the purchased service(s).
Synchronous: Yes (waits for response, times out if no response received)
URL Structure:
Simple Custom Example
www.yourserver.com/YourScriptName.php?action=<action>&username=<extra username>Full Custom Example (All Available Parameters)
www.yourserver.com/scriptname.php?action=<action>&username=<extra username>&purchaseid=<purchaseid>&tranid=<tranid>&name=<billname>&firstname=<billnamefirst>&lastname=<billnamelast>&email=<billemail>&phone=<billphone>&address=<billaddr>&city=<billcity>&state=<billstate>&zipcode=<billzip>&country=<billcntry>&ip=<ipaddress>&eticketid=<eticketid>&price=<price>¤cycode=<currencycode>&initialvalue=<ival>&initialperiod=<iint>&recurringvalue=<rval>&recurringperiod=<rint>&desc=<desc>&customvariable=<extra customvariable>Required Response: `GOOD` (or your custom "Expected Response" value)
Disable Postback
Trigger: When a subscription reaches its expiration date or when expiration is requested via chargeback or refund/cancel request.
Purpose: Instruct your system to remove access for the member.
Synchronous: Yes (waits for response, times out if no response received)
Limited Data Available:
-
Action (default: `Disable`)
-
Username
-
Purchase ID
-
Transaction ID (available for refund/void/chargeback only)
-
Refund Reason Code (available for refund/void/chargeback only)
-
Refund Code (available for refund/void/chargeback only)
-
Refunded By (available for refund/void/chargeback only)
-
Any custom variables sent in the original transaction
URL Structure:
Simple Custom Example
www.yourserver.com/YourScriptName.php?action=<action>&username=<extra username>Full Custom Example
www.yourserver.com/YourScriptName.php?action=<action>&username=<extra username>&purchaseid=<purchaseid>&tranid=<tranid>&ip=<ipaddress>&customvariable=Required Response: `GOOD` (or your custom "Expected Response" value)
Cancellation Postback
Trigger: When a customer cancels an account or requests a refund and cancellation.
Purpose: Notify your system that the member requested cancellation.
Synchronous: Yes (waits for response, times out if no response received)
Limited Data Available:
-
Action (default: `Cancel`)
-
Username
-
Purchase ID
-
Transaction ID (sent for refund/void/chargeback)
-
URL ID
-
Cancellation Reason Code
-
Cancellation Code
-
Cancelled By
-
Any custom variables sent in the original transaction
URL Structure:
Simple Custom Example
www.yourserver.com/YourScriptName.php?action=<action>&username=<extra username>Full custom example
www.yourserver.com/YourScriptName.php?action=<action>&username=<extra username>&purchaseid=<purchaseid>Required Response: `GOOD` (or your custom "Expected Response" value)
Reactivation Postback
Trigger: When a cancelled or expired subscription is reactivated.
Purpose: Notify your system to reinstate access for the member.
Synchronous: Yes (waits for response, times out if no response received)
Limited Data Available:
-
Action (default: `Reactivation`)
-
Username
-
Purchase ID
-
URL ID
-
Customer name (billname)
-
Recurring amount (rval)
-
Currency code
-
Reactivation timestamp
-
Ticket ID (eticketid)
-
Last bill date
-
Next bill date
-
Any custom variables sent in the original transaction
URL Structure:
Simple custom example
www.yourserver.com/YourScriptName.php?action=<action>&username=<extra username>Full custom example
www.yourserver.com/YourScriptName.php?action=<action>&username=<extra username>&purchaseid=<purchaseid>Required Response: `GOOD` (or your custom "Expected Response" value)
Transaction Postbacks - Details
Trigger: Any transaction (payment, refund, void, chargeback)
Synchronous: No (asynchronous; does not wait for response)
Response Handling: Uses standard HTTP response codes to indicate success or failure. See [RFC 2616 HTTP Status Codes](http://www.w3.org/Protocols/rfc2616/rfc2616-sec10.html).
Up to Four Postbacks Allowed: Create multiple transaction postbacks to send data to different systems simultaneously.
URL Structure:
Full custom example
www.yourserver.com/scriptname.php?action=<action>&stage=<stage>&approved=<approved>&trantype=<trantype>&purchaseid=<purchaseid>&tranid=<tranid>&price=<price>¤cycode=<currencycode>&eticketid=<eticketid>&ip=<ipaddress>&initialvalue=<ival>&initialperiod=<iint>&recurringvalue=<rval>&recurringperiod=<rint>&desc=<desc>&username=<extra username>&name=<billname>&firstname=<billnamefirst>&lastname=<billnamelast>&email=<billemail>&phone=<billphone>&address=<billaddr>&city=<billcity>&state=<billstate>&zipcode=<billzip>&country=<billcntry>&merchantpartnerid=<extra merchantpartnerid>&transGUID=<transguid>&standin=<standin>&xsellnum=<xsellnum>&billertranstime=<transtime>&REF1=<extra ref1&customvariable=<extra customvariable>&relatedtranid=<relatedtranid>&singleusepromo=<singleusepromo>&paymentaccountid=<paymentaccountid>