Manage Websites
The Segpay Merchant Portal makes it easy to add and manage the website(s) where you accept payments.
Adding Websites
Follow these steps to add your website to the Segpay system.
-
Log into the Merchant Portal: https://mp.segpay.com
-
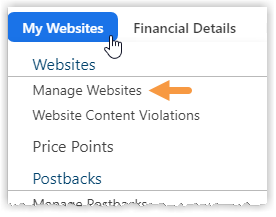
From the navigation menu, click My Websites > Manage Websites
-
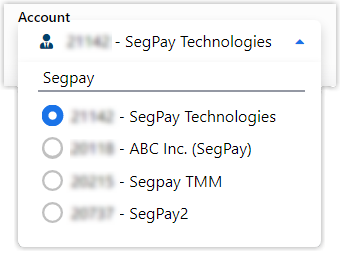
Select the merchant account associated with this website (if you have more than one account).
-
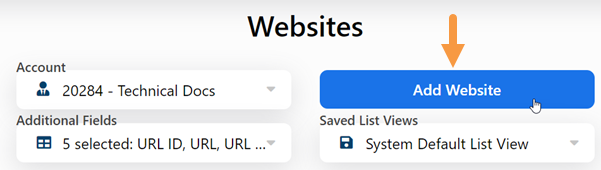
Click the Add Website button.
-
Fill out the following sections on the form:
Website Information
-
Enter your website URL (Required).
-
Select Cash Program (if you have one).
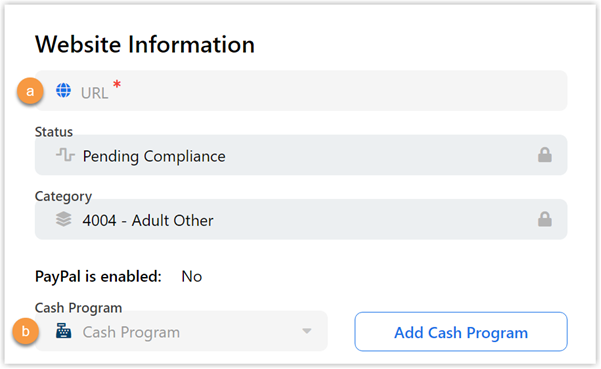
You don't have to add a Cash Program at this time. If you have a program, but don't see it in the list, follow these steps:
1. Click the Add Cash Program button.
2. Enter a name for the program (required).
3. Enter the URL (don't include http://).
4. Select a Vendor from the drop-down list.
5. Click the Add button.
The system will add your new cash program to the list.
Account Information
Provide a valid username and password that the Segpay Compliance Team can use to access and review your website.
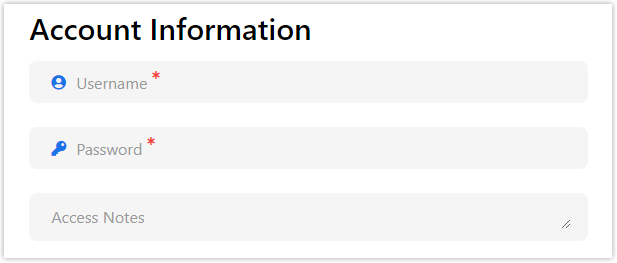
This information is required, and you must keep this username and password active if future reviews are necessary by Segpay Compliance or the bank.
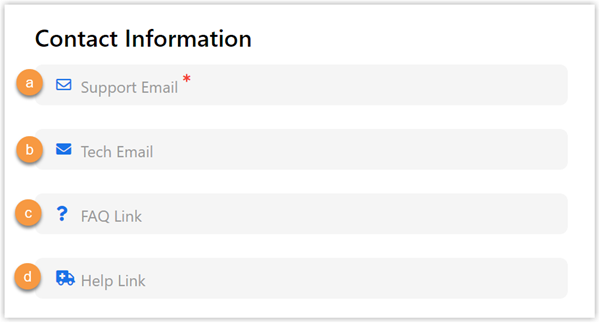
Contact Information
-
Enter the required Support Email address used for customer support inquiries related to this website.
-
Enter the optional Tech Email address used for technical inquiries related to this website.
-
Enter the optional FAQ Link URL used to access the Frequently Asked Questions page for this website.
-
Enter the optional Help Link URL used to access the support page for this website.
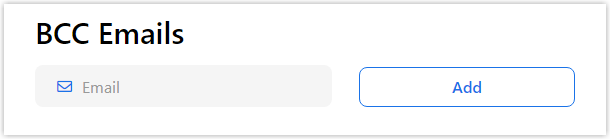
BCC Emails
If you want to receive blind copies of emails for new signups, enter an email address in this field and click the Add button. You can add as many email addresses as you like.
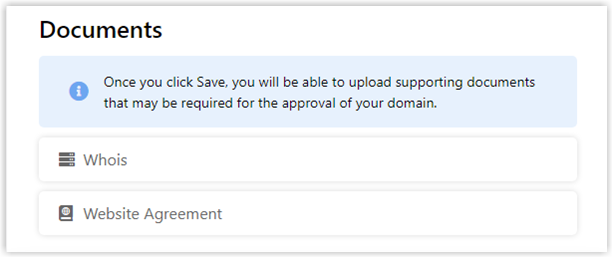
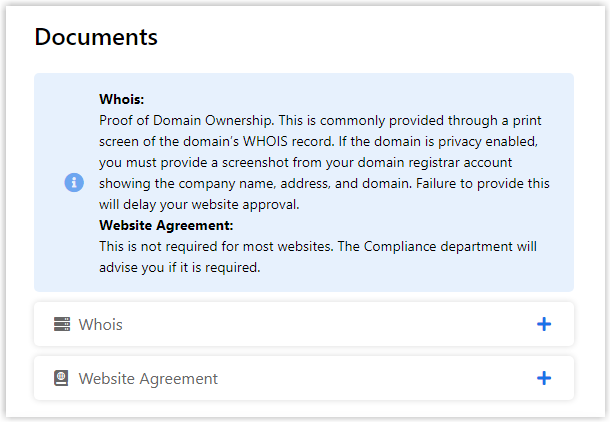
Documents
Contact your Sales Rep to determine if you need to upload supporting documents for your website. You must click the Save button on the bottom of the form to enable the document upload feature.
-
-
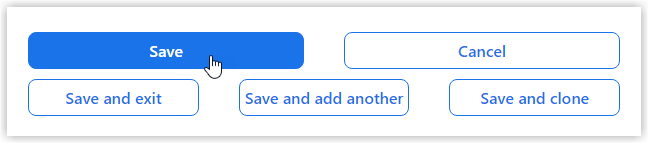
Click the Save button to submit your website information.
-
After saving your new website information, you'll be able to upload your supporting website documentation if your Sales Rep advised you to do so:
-
Click the + sign to upload a screenshot of your website's WHOIS record.
-
Click the + sign to upload your Website Agreement, if Segpay Compliance advised you to do so.
-
Viewing All Websites
After you’ve created at least one website, you can view your list of websites by clicking My Websites > Manage Websites in the Merchant Portal.
-
If you have more than one merchant, select the merchant whose sites you want to see.
-
If you have a long list of websites, you can use the search box near the top of the page. Just enter the first few letters of the website URL until it appears in the table.
-
If you have more than 25 websites, you will see the first 25 on the page by default. Click the Items per Page menu below the report to increase the results per page to 50, 100 or “All” (to see all websites on one page). If you have more than one page, use the arrows to move back and forth between pages in your list.
TIP: You can export your full list of websites to a CSV, PDF or Excel file. Just click the Download link in the top-right area above your list of websites, then name your file, select a file type and click Download.
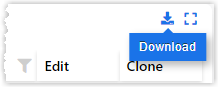
The file will be saved to your computer’s Downloads folder, and will include your list of websites along with the following for each site.
Making Changes
As you see in the image above, two links appear to the right of each website in your list:
-
Edit: Make changes to any of the options you selected when creating the site (see Add Websites section above).
-
Clone: Create a copy of the website. See Save and Clone option in the previous section.