Manage Subsites
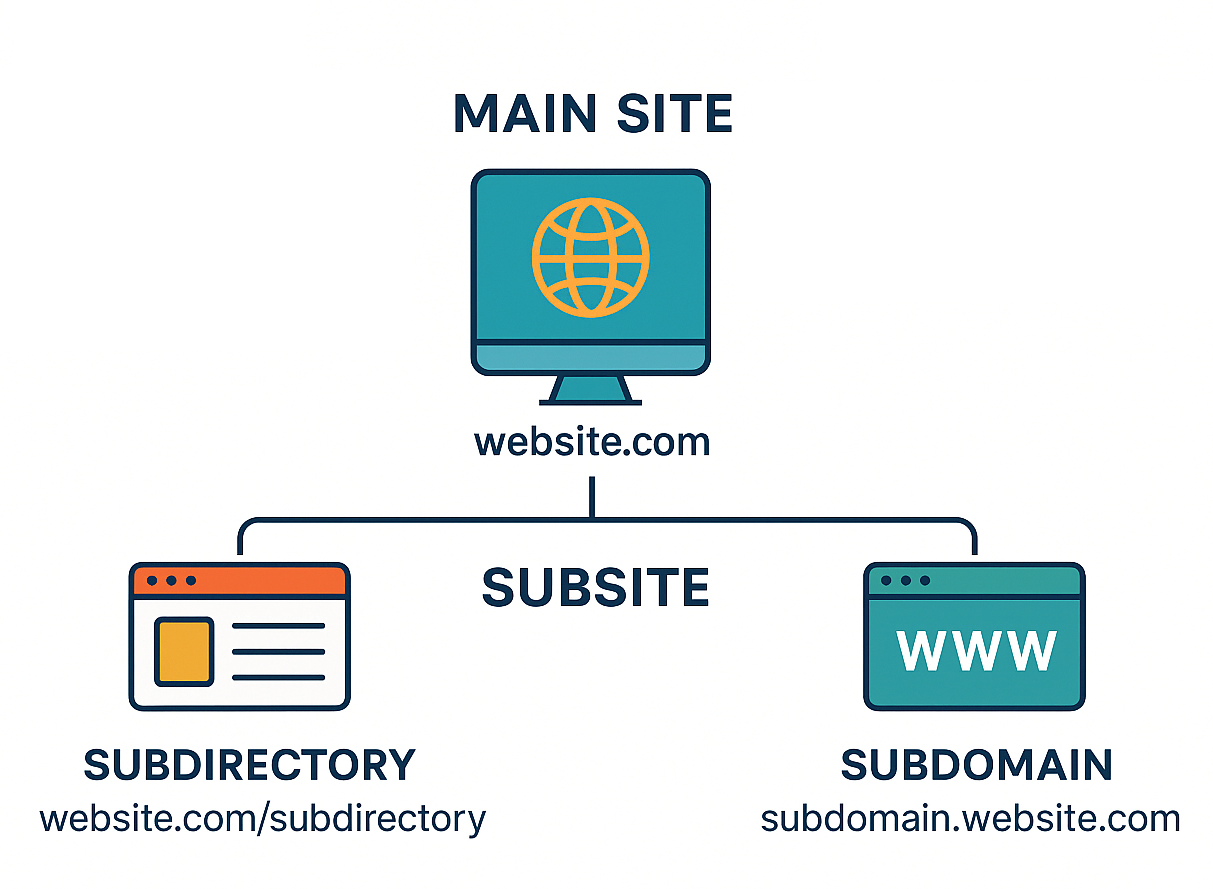
The Subsites feature in the Segpay Merchant Portal allows you to manage multiple secondary websites under a single main domain. A Subsite is a secondary website that operates under a main website (referred to as the Main Site).
Subsites offer key advantages for portal performance, organization, and scalability:
-
Faster Portal Performance: Subsites improve loading times for reports and configurations by organizing related URLs together, which reduces system load.
-
Clearer Organization: Connecting related subdomains or subdirectories to a single Main Site creates a more logical and easy-to-navigate structure.
-
Scalable for Growth: Subsites maintain stability and efficiency when handling high-volume operations like content platforms and multi-user sites.
There are two ways to configure subsites:
| Subsite Type | Example |
|---|---|
| Subdirectory |
|
| Subdomain |
|
-
All subsites must be linked to a Main Site (e.g.,
http://website.com ) which acts as the root domain. -
One Main Site can support multiple subsites.
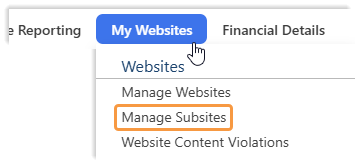
How to Access Subsites
To access the Subsites management interface:
-
Log into the Merchant Portal: https://mp.segpay.com/
-
Select My Websites > Manage Subsites from the navigation menu
This will take you to the Subsites management page.
If "Manage Subsites" is not visible in the menu, your account needs activation for this feature. Please contact Technical Support.
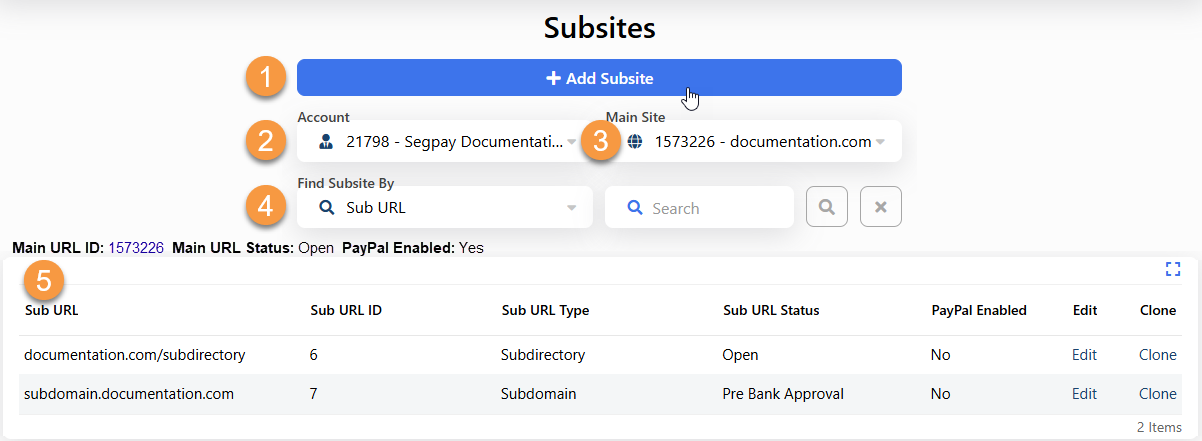
Subsites Management Page
The Subsites page provides management tools for your website infrastructure:
-
Create New Subsite: Click the Add Subsite button to open the Subsite creation page. -
Account Selection: Choose from your linked accounts via the Account dropdown menu. -
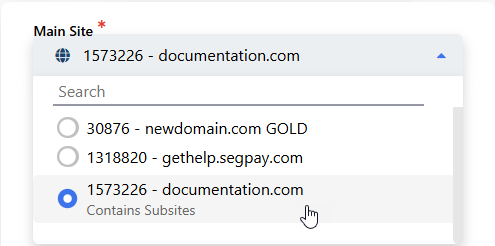
Main Site Selection: Select your primary domain from available URLs listed in the Main Site menu. -
Search Functionality: Locate specific subsites using either Sub URL or Sub URL ID. -
Management Grid: View and manage your subsites with the following features:-
Displays Main URL ID, Status, and PayPal integration status
-
Lists subsites chronologically
-
Supports column sorting and filtering (except for action columns)
-
Provides editing and cloning capabilities for your subsites
-
Adding a Subsite
Follow these steps to add a new subsite:
-
Navigate to My Websites > Manage Subsites.
-
Click the Add Subsite button.
-
In the Account drop-down, select your merchant account (if you have multiple accounts).
-
Select the parent website from the Main Site drop-down.
-
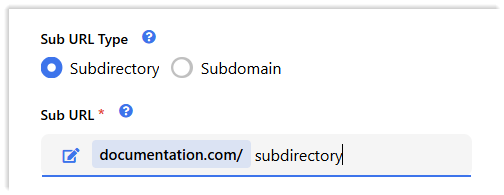
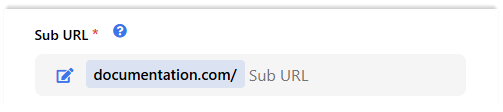
Configure the subsite URL:
-
Choose your preferred Sub URL Type (Subdirectory or Subdomain)
-
Enter the Sub URL that will identify your subsite
-
-
Enter the Username and Password for accessing the subsite.
-
Review all entered information and click Save to create your subsite.
Modifying a Subsite
The Subsites feature offers flexibility in managing your websites through two key functions: editing and cloning. Editing allows you to customize and update specific details of existing subsites, while cloning helps you efficiently create new subsites by copying configurations from existing ones. These tools make it easy to maintain and expand your website infrastructure while ensuring consistency across your digital presence.
Editing a Subsite
Editing lets you modify an existing subsite's specific details without creating a new one. This option works best when you want to keep the subsite's core structure while updating elements like status, URL type, or account information to match current needs or compliance requirements.
To edit a subsite, follow these steps:
-
Navigate to My Websites > Manage Subsites.
-
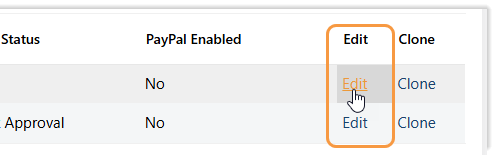
Click the Edit link for the specific subsite to edit.
-
Edit Subsite Details as needed:
-
Locked Fields: The [Account], [Main Site], and [Status] dropdown fields are not available for modification.
-
Sub URL Type and Sub URL Fields: These can be modified if the subsite is in the ‘Pending Compliance’ status. Otherwise, they are locked.
-
Account Information Fields: These can be modified regardless of the status.
-
-
Click one of the Save options to save your changes.
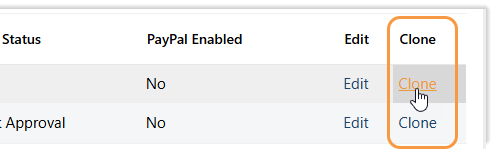
Cloning a Subsite
Cloning allows you to replicate an existing subsite's setup for a new project or purpose. This feature is especially useful when you need to maintain consistency across multiple subsites or create a new subsite with similar configurations to an existing one.
To clone a subsite, follow these steps:
-
Navigate to My Websites > Manage Subsites.
-
Click the Clone link for the specific subsite to clone.
-
Review and Modify Fields as needed:
-
The fields such as [Account], [Main Site], and [Sub URL Type] will automatically default to the values selected on the original subsite.
-
The [Account Information] fields will also default to the original subsite's entries.
-
You can modify any of the pre-populated fields by selecting or entering different values.
-
The [Status] dropdown field is locked and set to ‘Pending Compliance’ by default.
-
-
Enter the Sub URL.
-
Click one of the Save options.
Creating Subsite Join Links
These instructions show you how to create a join link for a specific subsite by adding the Subsite parameter to your main website's package join link. The subsite URL must be associated with the package's configured main site.
-
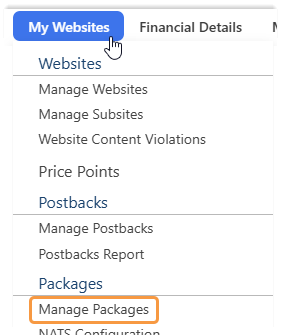
Log into the Merchant Portal: https://mp.segpay.com/
-
Navigate to My Websites > Mange Packages
-
Select the package associated with the main site from the list that you want to use.

-
Click the Pricing tab.

-
Click “Get my button code” for the price point you want to use.

-
Click “Go to this page.”
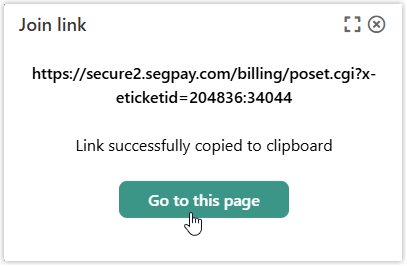
-
Add the the Subsite parameter to the url & include the Sub URL ID:
&suburlid={suburlid}https://secure2.segpay.com/billing/poset.cgi?x-eticketid=xxxxxx:xxxxx&suburlid=6
-
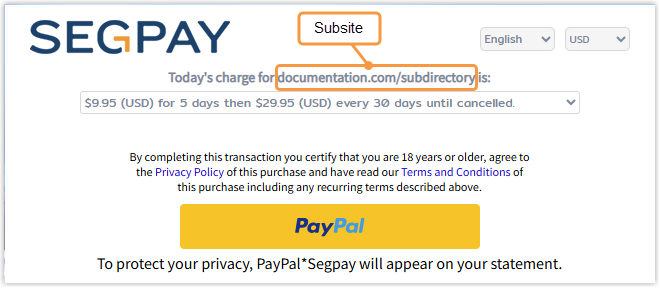
View the updated payment page, which should now show that the charge will be associated with the subsite, as displayed at the top of the page.
Subsite Postbacks
The SubURLID parameter enables merchants to track and manage subsite activity.
-
Default Postbacks: Automatically include the
SubURLIDparameter when a purchase is processed through a subsite. If the purchase is not through a subsite, the parameter is either omitted or sent without a value. -
Custom Postbacks: Can include the
SubURLIDparameter, which contains a value only for transactions processed through a subsite.
Tracking & Reporting
When using the Merchant Portal, you can easily identify subsite purchases in two places:
-
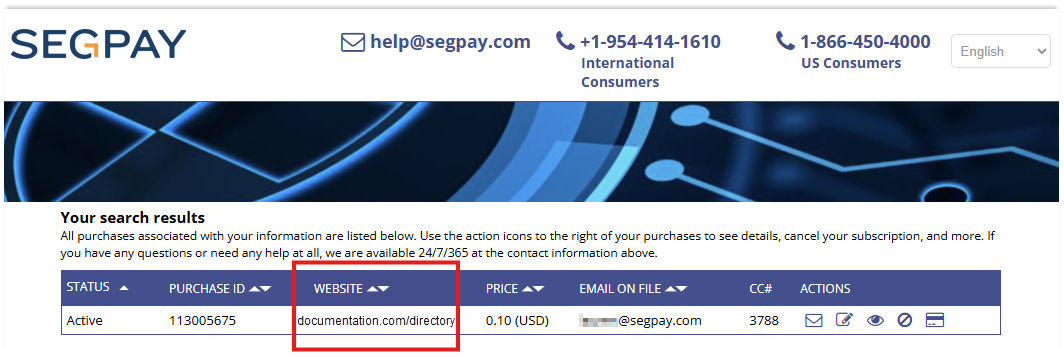
In consumer search results (My Consumers > Manage Consumers), check the Website column
-
In purchase details, look for the Website field under Purchase Information
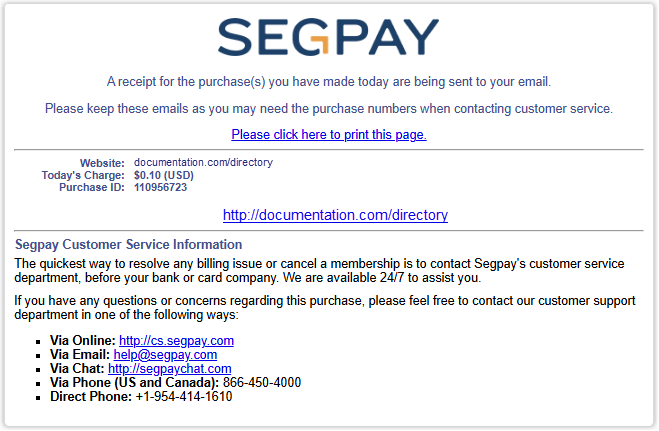
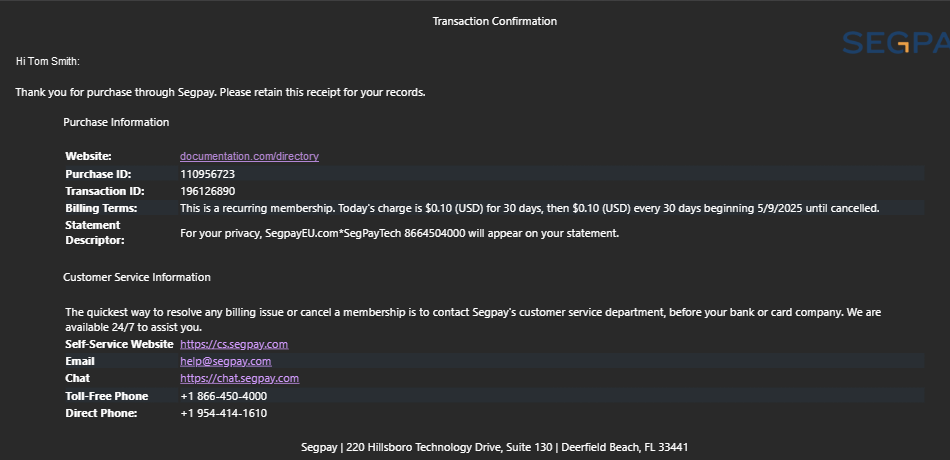
In both cases, if the purchase was made through a subsite, you'll see the subsite URL instead of the main site URL. The subsite appears as a clickable link that opens the actual subsite in a new tab.
Merchant Portal Reports
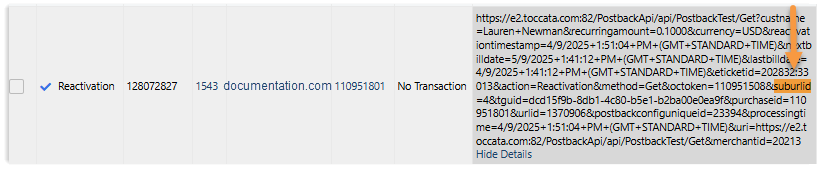
In Merchant Portal reports, you can identify subsite transactions by checking the Sub URL column. This column appears when at least one of the selected accounts is enabled for subsites. For any transaction processed through a subsite, the Sub URL will be shown in this column.
SRS Report
The TransactionsPurchasesByURL report in the SRS (Segpay Reporting System) tracks transactions by URL. With the addition of the SubURLID parameter, merchants can now view and distinguish between transactions from both main sites and subsites in a single report.
For more information on SRS, see the Segpay Processing API Guide.
Consumer Experience
Consumers can easily identify transactions made for a website because they will see the specific Subsite URL (instead of the Main Site) displayed across all consumer-facing touchpoints, including the Consumer Portal, email communications, and transaction receipts.
![]()