Manage Packages
Managing payment packages for your online business is easy with the Segpay Merchant Portal. Our portal lets you create customized packages for your customers. This guide will show you how to add, view, and modify packages, set up configurations, and use multicurrency cross-sells.
What is a Payment Package?
A payment package consists of price points, associated websites, and templates to streamline the customer payment process. Once you have set up a package, you can generate a unique "Join Link" that directs your customers to a personalized payment page. Additionally, you can take advantage of Segpay's Cross-Sell feature, which supports multiple currencies and can help you increase your revenue potential.
Adding a Package
To set up a new package:
-
Log into the Segpay Merchant Portal.
-
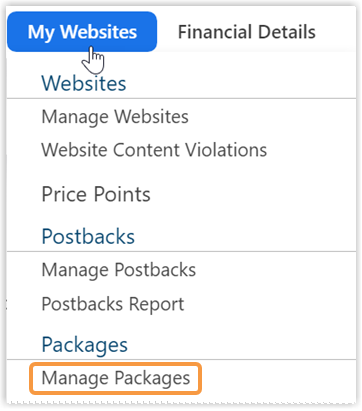
Go to My Websites > Manage Packages.
-
Click Add Package.

-
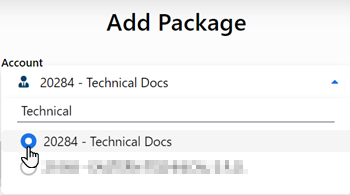
Choose the related merchant account (use the search box if needed).
-
Configure package settings:
-
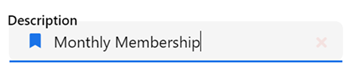
Enter a package Description
-
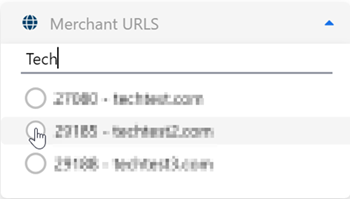
Select the associated URL
-
Set the Processing Status to Always Approve CC
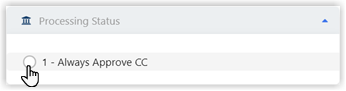
When adding a package, select the only available option, Always Approve CC, to set the package in "Test Mode." Contact Tech Support when you're ready to switch the package to "Live Mode."
-
-
Click Save.
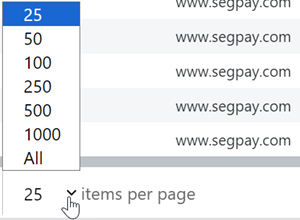
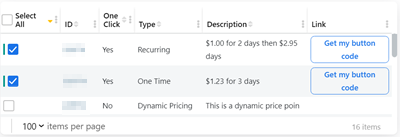
Viewing Packages
To view all your packages in the Merchant Portal:
-
Navigate to My Websites > Manage Packages to view your package list.
-
Adjust viewing settings for lists with more than 25 packages.
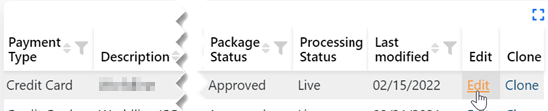
Modifying an Existing Package:
To update changes for a packages you've already created:
-
Find the package in your package list:
My Websites > Manage Packages -
Click the Edit link to make changes.
-
Save your changes.
The Clone option is available to duplicate a package.
Configuring Packages
To begin configuring packages:
-
Log into the Segpay Merchant Portal.
-
Navigate to My Websites > Manage Packages.
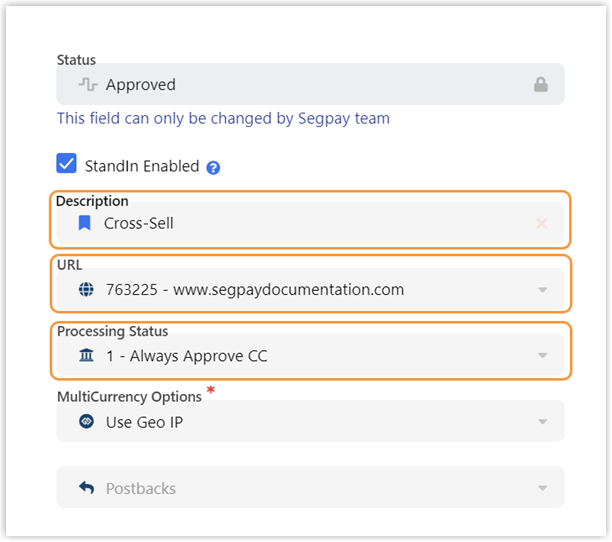
Basic Settings:
-
Select the Package tab.

-
Select and enter the following:
-
Description
-
URL
-
Processing Status
-
-
Click Save.
Alternative Payments:
-
Select the Alternative Payments tab

-
Check one or both alternative payment options to use with your package: PayPal Enabled, Crypto Enabled
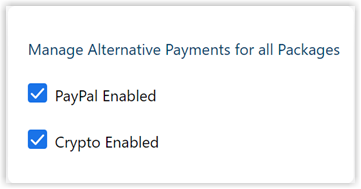
-
Click Save.
Pricing Setup:
-
Select the Pricing tab.

-
Select the currency for this package.
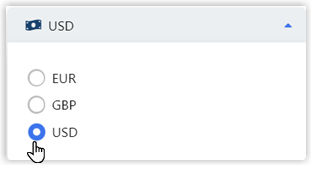
-
Select the price points for this package.
-
Click Save.
Cross-Sells:
When setting up packages for a main sale on your website, you can show other related offers known as cross-sells. Cross-sells are an effective way to introduce customers to additional products or services that complement their main purchase.
Default Setup & Exceptions
-
Default Capability: Merchants can add one opt-in cross-sell to their packages by default.
-
Requesting Exceptions: If you require additional cross-sells or specific cross-sell features, please submit a request to your Account Manager. The Risk and Compliance department will review these requests on a case-by-case basis.
Adding Cross-Sells
-
To Your Account: Merchants can add a cross-sell to any site within their account directly through the Segpay Merchant Portal.
-
Third-Party Cross-Sells: Contact Merchant Support for guidance and approval to request cross-sells that link to third-party sites.
Enabling Cross-Sells
You can select additional offers you want to appear on your payment page for a specific package under the Cross-Sell Configuration tab.
-
Log into the Segpay Merchant Portal.
-
Navigate to My Websites > Manage Packages.
-
Locate the package to which you want to add a cross-sell, and click Edit.
-
Select the Cross-Sell Configuration tab.

-
Select the offer/price point you want to use from the Cross-Sells drop-down menu. Note that all eligible price points are available regardless of currency.
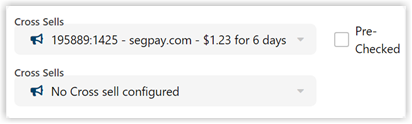
-
Click Save.
Cross-Sells support multicurrency. To utilize this feature for your cross-sell package, please see the steps below for enabling multicurrency.
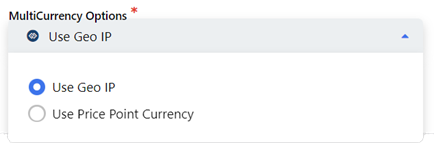
Enabling Multicurrency
Enabling multicurrency allows you to present and process your main sale and cross-sells in various currencies, catering to customer preferences or locations. This feature ensures uniform pricing across your products and extends your market reach internationally.
-
Navigate to My Websites > Manage Packages
-
Locate your cross-sell package and click Edit.

-
Enable multicurrency by opening the MultiCurrency Options drop-down menu and selecting either Use Geo IP or Use Price Point Currency.
-
Geo IP: Automatically sets the currency based on the customer's location, displaying prices in the local currency.
-
Price Point Currency: Maintains set price points for different currencies, ideal for specific market strategies or consistent pricing across regions.
-
-
Click Save.
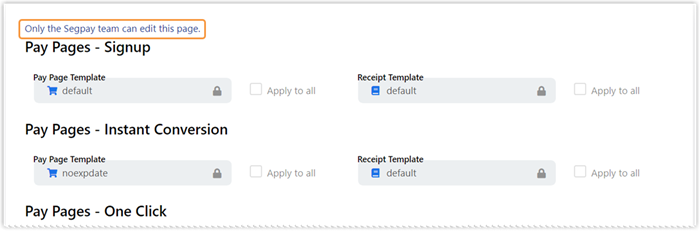
Payment Page Templates:
When you click the Pay Page Templates tab for your package, you'll have the opportunity to review three types of Pay Pages, the default templates assigned to each, and their corresponding receipt pages.

Typically, the default template is pre-selected for all payment and receipt pages. Only the Segpay Team can make modifications in this area. Should you require a custom-designed payment page, contact Technical Support for further assistance.
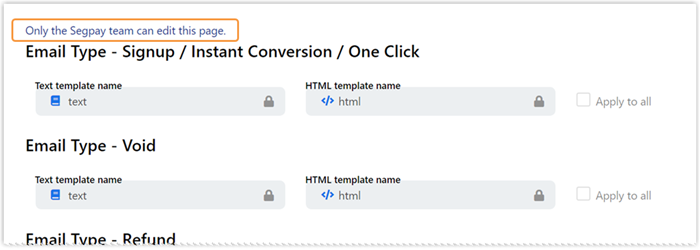
Email Templates Tab:
Automated emails are essential for informing customers about various activities, such as sign-ups, refunds, and cancellations. From the Email Templates tab, you can view the predefined template names associated with each type of customer communication.

Note that customization of these templates is restricted to the Segpay Team. If you need a customized email template that aligns more closely with your brand or messaging, contact Technical Support.
Miscellaneous Configurations
The MISC Configurations tab shows additional pay page settings.

Only the Segpay Team can make modifications on this screen, and Technical Support can assist with any changes.
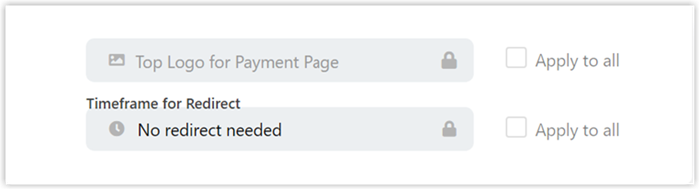
The tab includes:
-
Top Logo for Payment Page: Specifies the logo displayed on your payment page.
-
Timeframe for Redirect: Sets the duration from purchase to the redirection back to your website after displaying the receipt page.