Dispute Alerts Report
The Dispute Alerts Report in the Merchant Portal allows you to view your matched consumer disputes, and lets you reverse transactions to avoid getting chargebacks.
Creating a Dispute Alerts Report
Follow these steps to create a report and view dispute records:
-
Log into the Merchant Portal: https://mp.segpay.com/
-
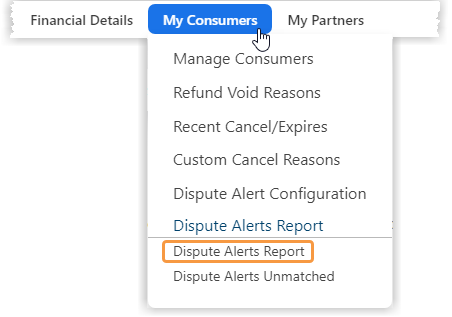
On the navigation menu, go to My Consumers > Dispute Alerts Report
-
Select your Merchant Account(s) from the drop-down menu.
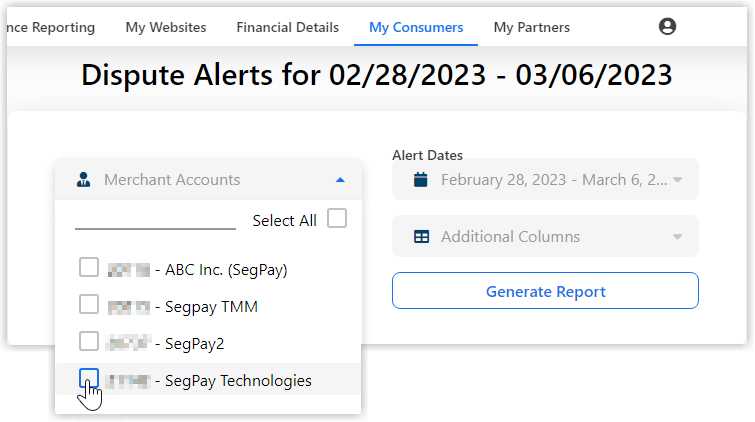
If you don't see your merchant account listed, then it's not enrolled in the Dispute Alerts program.
To enroll, log into the Merchant Portal and go to My Consumers > Dispute Alert Configuration. You can also contact you Sales Rep if you need help with this.
-
Select the Alert Status options you want to see.
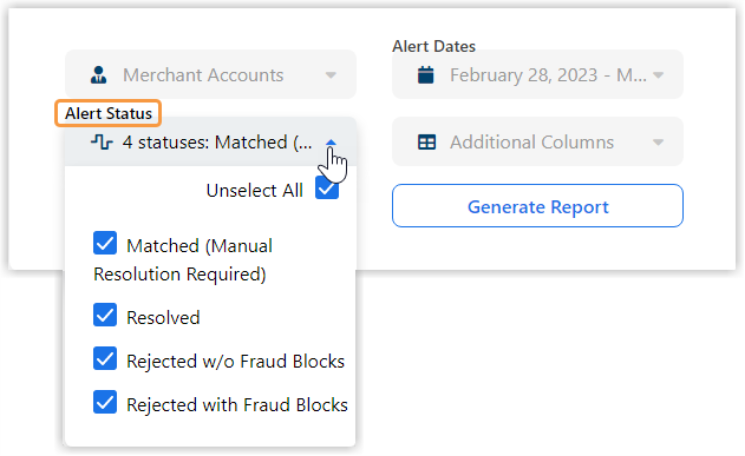
Matched (Manual Resolution Required) is selected by default in the Alert Status drop-down menu.
Pending alerts with a checkbox need to be resolved manually with either a refund or rejection. Pending alerts without checkboxes have automatically processed a resolution.
-
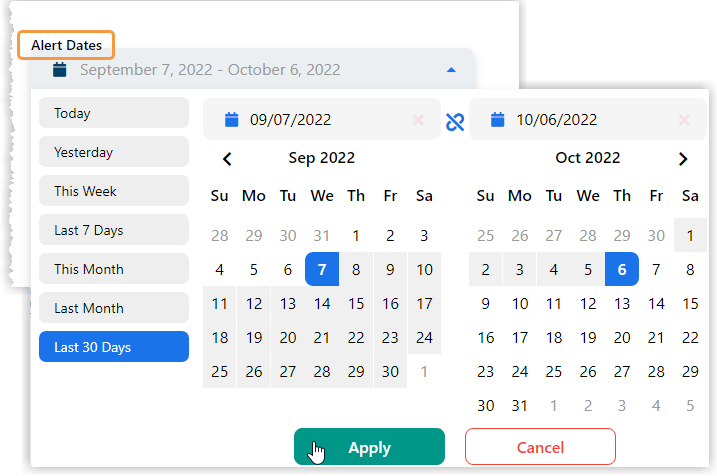
Select the Alert Dates you want to view.
-
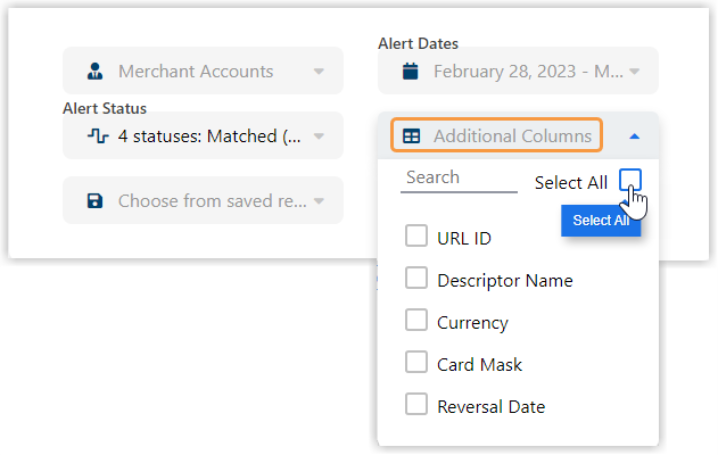
Select any Additional Columns you may want to see.
-
Click the Generate Report button.
The report will only show the dispute records for the Merchant accounts you selected in step 3. The image shows the data that is available to you in the report.
Saving a Dispute Alerts Report
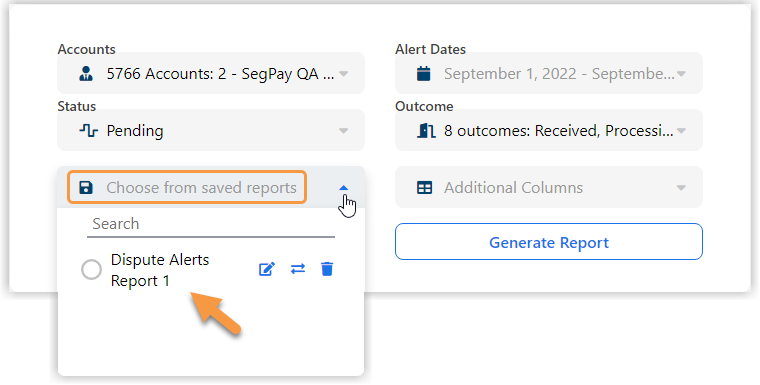
After generating a Dispute Alerts Report, you have the option to save the report filters for future use. Follow these steps to save your report filters:
-
Click the Save icon.

-
Type a name for your report and click Save.
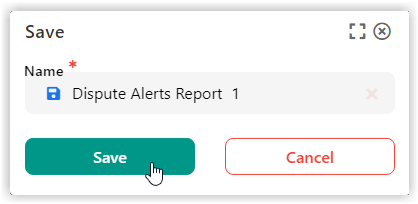
The saved report filters will now be listed as an option in the Choose from saved reports drop-down menu on the Dispute Alerts Report page (see image below).
Downloading a Dispute Alerts Report
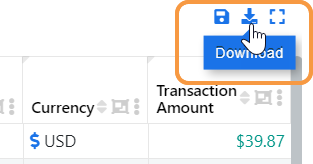
After generating a Dispute Alerts Report, you have the option to download the report in one of three file format types: CSV, Excel, PDF. Follow this steps to download the report to your device:
-
Click the Download icon.
-
In the Download window, make your selections for the file:
-
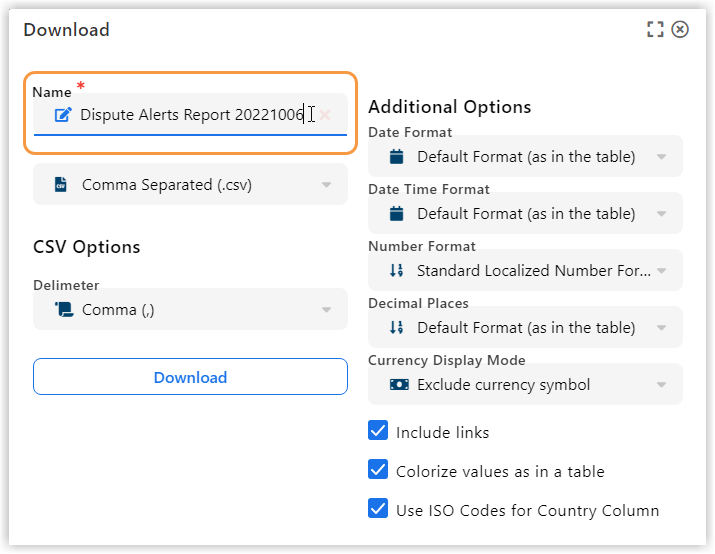
Enter a Name for the file.
-
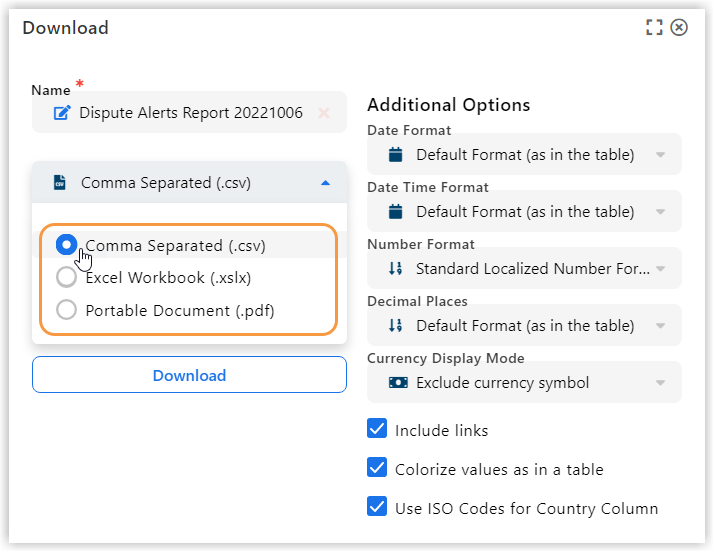
Select one of the three file types from the drop-down menu.
-
Select a file type option.

-
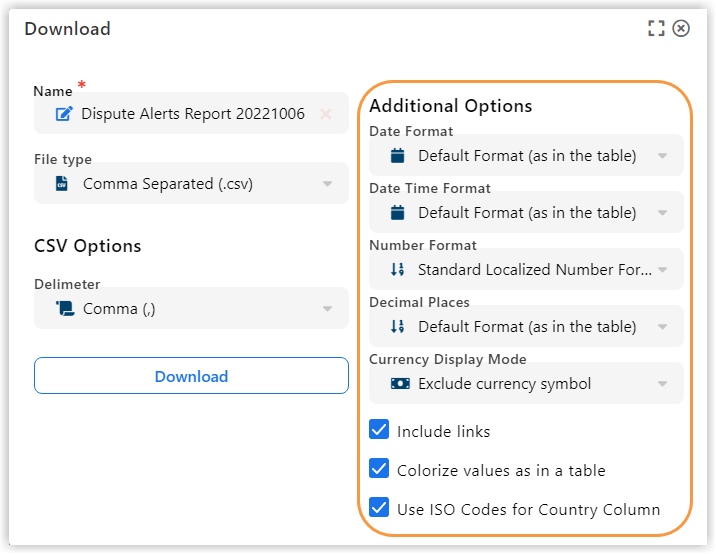
Select any Additional Options for the file.
-
-
Click the Download button to download the file to your device.
Resolving Alerts
After generating a Dispute Alerts Report, you are able to resolve alerts shown in your report to avoid getting chargebacks. Follow these steps to resolve alerts:
-
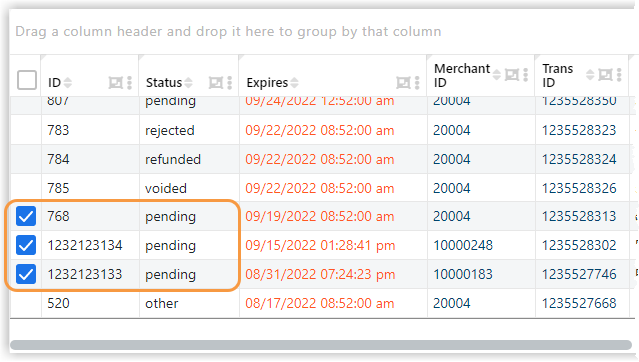
Select the checkboxes next to alerts showing a pending status.
-
Click the button, Resolve Selected Alerts.

-
In the Resolve Selected Alerts dialog box, choose the following actions:
-
Select a Resolve Action:
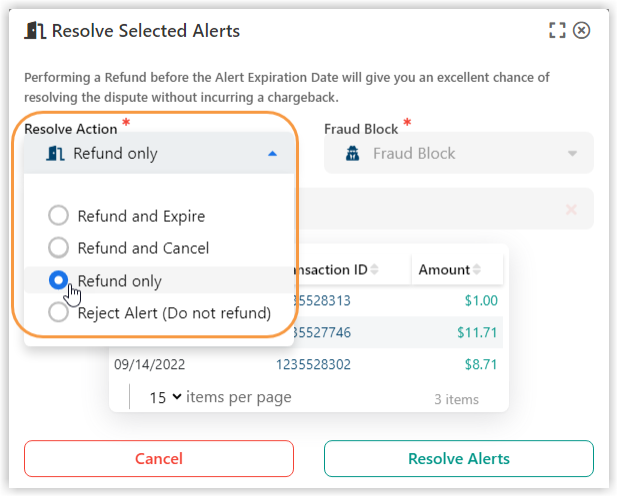
Refund & Expire Refund the transaction and expire the subscription. Refund & Cancel This works like the Manage Consumer Refund and Cancel. Refund Only Only provide a refund. Reject Alert Do not refund. -
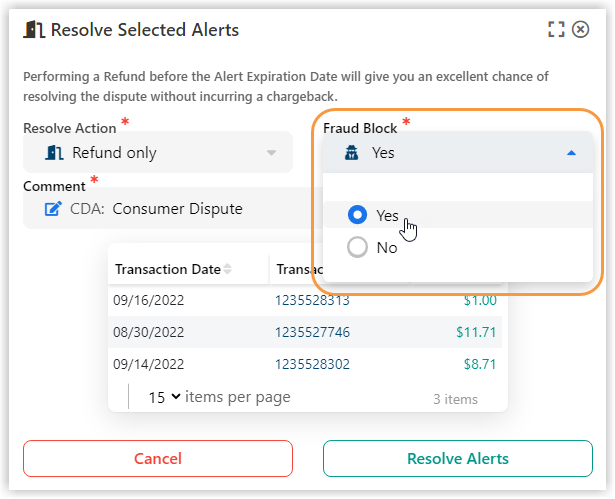
Select a Fraud Block option:
-
Yes: Adds fraud blocks on the consumer's card, email, and deviceID.
-
No: Does not add any fraud blocks for this consumer.
-
-
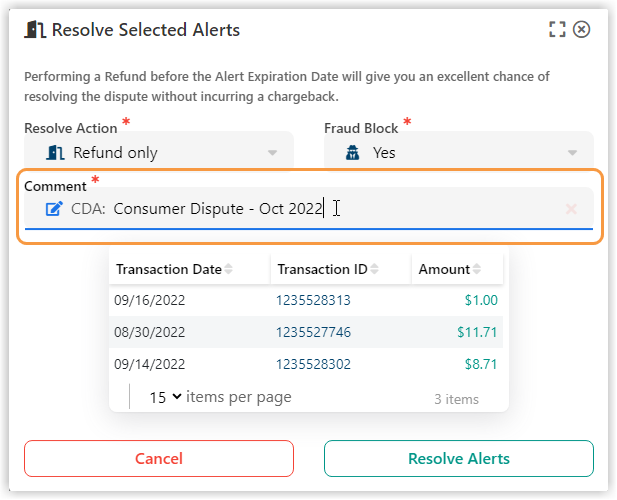
Enter a Comment (optional).
-
Click the Resolve Alerts button.
-
-
Click the Yes button in the Confirmation dialog box to Refund or Reject the transactions.
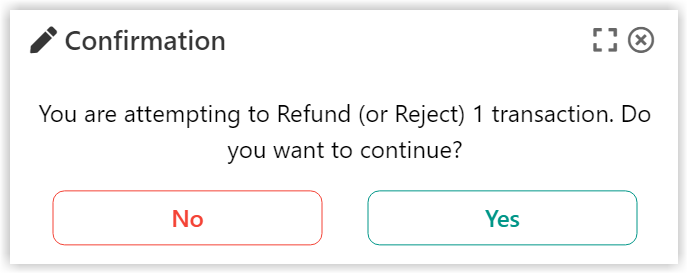
Rejecting a transaction allows you to apply fraud blocks without a refund but won't help you avoid a potential chargeback.
-
A Resolve Selected Alerts pop-up appears indicating the resolution process is complete. Click the Close button.

Resolved alerts will no longer show checkboxes beside them. You may need to refresh your page.
Reviewing Resolved Dispute Alerts
To review resolved Dispute Alerts, you need to create a report or open a saved report.
-
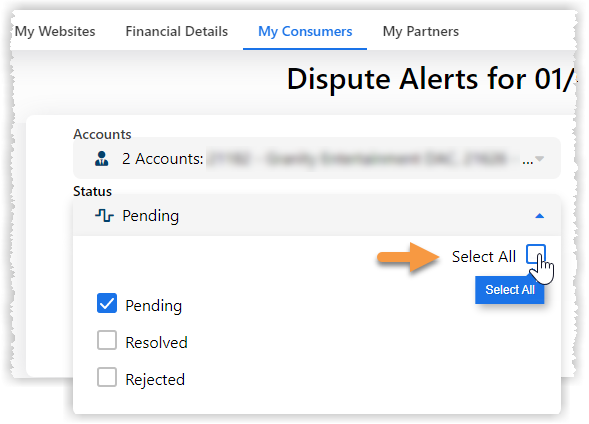
View your report in the Merchant Portal and change the Status filter from Pending to Select All.
-
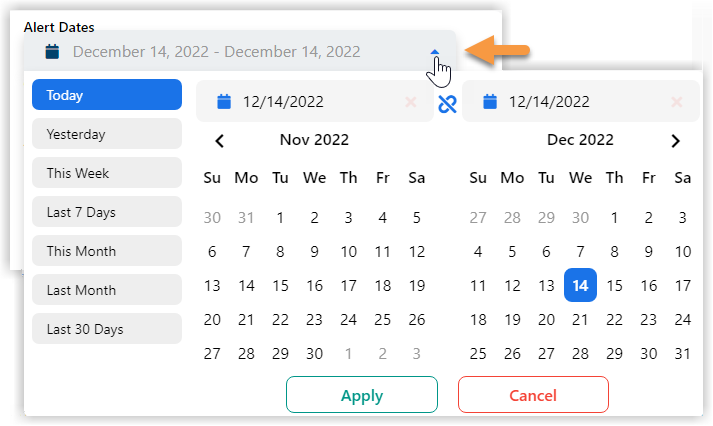
Change the Alert Dates range to view older alerts and click Apply.
-
Click the Generate Report button again to apply the new settings.
-
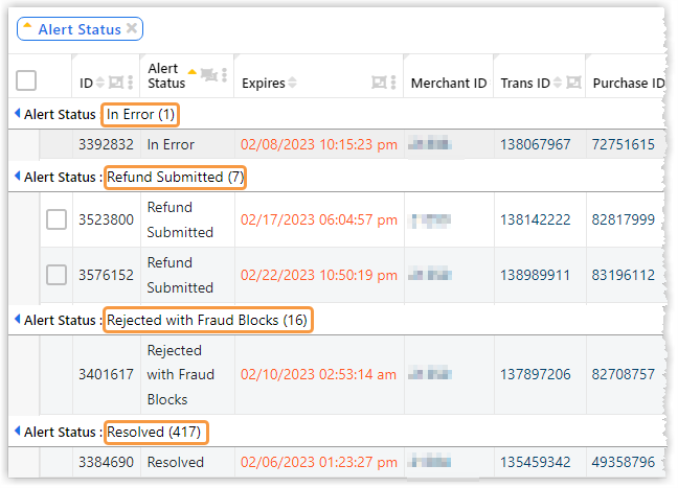
Drag the Alert Status column heading into the row above to group alerts by their status categories.

Grouping by Alert Status helps you quickly see the status of alerts.
-
View the alerts by their status categories.
Status Categories for Dispute Alerts
The table defines the various status categories for dispute alerts.
| Status Category | Description |
|---|---|
| Matched | The dispute alert is ready for manual resolution and shows a checkbox. |
| Resolved | Resolution for the dispute alert completed. |
| Rejected | The dispute alert was manually rejected (not refunded) and could become a chargeback. |
| Pending |
This is a temporary status for the dispute alert that usually changes to "resolved" within 30 minutes. Applies to:
|
For the best chance at avoiding a chargeback, it's recommended that you handle a dispute requiring manual resolution before the expiration date shown in the report turns red (usually in 24 hours).